I read a ton of crafting blogs…. but they always seem to be geared towards Moms… and the projects always end up being for little kids. I was so happy when Katrine from make it & fake it emailed me to show me her blog. The projects are ones that I can actually recreate and they are projects I’d actually WANT to recreate. Katrine is guest posting today to share a tutorial on making a statement necklace.
*****
Hi Everyone!
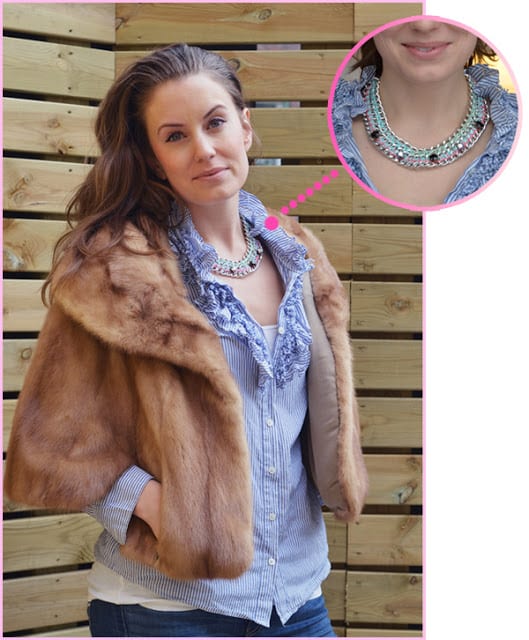
I am so excited to be a guest of Carly here on the amazing College Prep! Today I will show you how to make a great statement necklace, so lets get started.
I am loving the color trends for spring! So bright and fun! I am especially into the mint and fruity fresh pinks and corals for this season! Sometimes it’s hard to incorporate colors that intense without looking like a pack of fruit loops though.
My answer for crazy looking runway trends has always been accessories! Everyone can pull of a little pop of color (or any other insane trend from the runway), and it’s a great way to bring a little bit of what is on trend in to your wardrobe without breaking the bank (or your personal style).
Statement necklaces, what can I say.. they rock! This one will take you about an hour and look good all season.
I using this one to incorporate mint and neon pink in to my spring look, but you can use whatever color you want.
You will need: Cotton embroidery floss 2pks of the base color and one of the accent color. (I think leather string would also look so good, that will be my next project !) Chain (mine is a flattened curb chain), needle, rhinestones, a scissor and some cutting pliers.
Let the fun begin!
Measure the chain while they are in a “circle” that will make the one closest to your neck smaller which is what you want.
Start sewing them together. I am using a hairpin and the yarn is double, that gives you more bulk and color. For the first two chains (we are adding one more later) I was trying to take as many stitches as possible in each link, all the while making sure to keep the shape we made in the top picture (so that the necklace will sit nicely around your neck). When you are done all the way through its time to attach the thirds row. For this one I also used double yarn but only one/ two stitches in each link. Now its time to add the colored thread! Measure out where you want the stones and sown them on (I split the floss and used that to get the same color). Braid the ends and attach a lock! seal the knot with clear polish and you are ready to go!
Hope you enjoyed this one as much as I did, for more DIY ideas come visit me over at make it & fake it


This is so cute!!!! I definitely want to give it a shot! I'm having trouble seeing the pictures close up enough to see the details. Is there any way you can post these zoomed in more? Thanks 🙂
I love doing DIY projects I just wish I had more time! I've tried to make jewelry before too but it always ends up falling apart 🙁
katiesbliss.com
Oooh, I love this! Definitely going on my list of projects! XO
http://northshoreprep.blogspot.com
omg! you are so talented!
xoxo navy & orange
Love it!! xoxo
http://www.hellohellofriday.com/
this is amazing.. i dont know how you do it.