
I am the first to admit that I don’t have an eye for interior design. I watch HGTV and read interior design blogs with pure awe. Watching people pull visions out of thin air or reading about interior choices fascinates me. I look at the houses Chip & Jo choose to flip and the first thought that pops into my head is, “Run for the hills!”
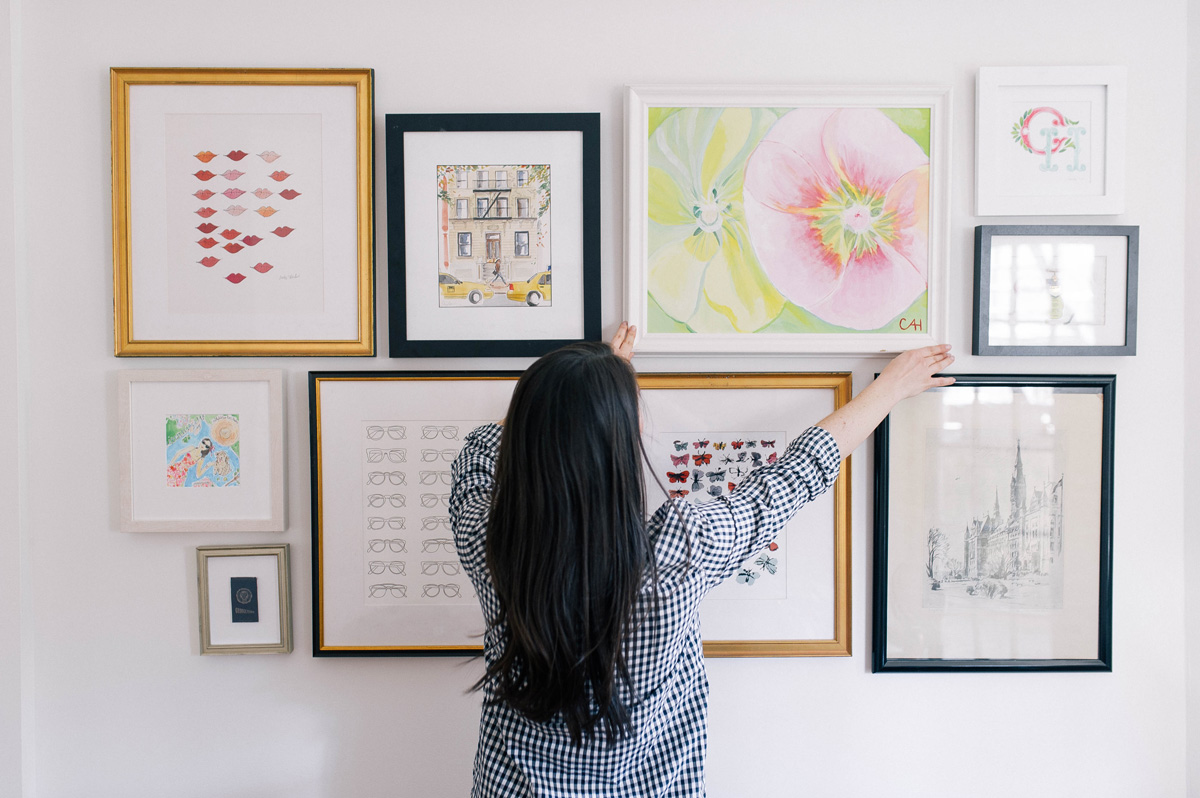
Setting up this apartment has been pretty easy because I had a lot of the furniture from my old apartment that would work. We’ve been reworking the living room and I had to order some things for my office space, but otherwise, it was great to get things set up that first weekend. The thing that definitely takes the most time? Hanging frames and art. A lot of the art I have is very “Carly” so the only place it could really go would be my office. After letting the frames collect dust on the floor for a couple of weeks, I finally got my hammer out and started hanging up a little gallery wall.
I put up the pinboard I have on the wall firstly to the left of my desk and a gallery of the frames on the wall to the right. When I put a quick IG story up of the wall, I was inundated with questions about how I did it. There are a ton of better resources out there on how to hang a gallery wall, but I figured I’d re-share some of the tips that I keep in mind.
ONE // Collect the pieces over time
One of my favorite parts of my gallery wall is that everything has been collected over time. I think it’s a mistake to rush to fill a home, and especially a wall, right away. Even though a wall may feel blank for a bit, it’s worth taking the extra time to get pieces you love.
My collection of framed pieces are from everywhere… trinkets I’ve framed, a painting I did in middle school, antiques I stumbled on and had to have, and even prints of work that I found on discount websites. I have more than what I put up on the wall. Next step is to find spaces for those around the apartment. I tried to stick to the most Carly/girly pieces for my office and gender neutral/general frames for the rest of the apartment to mix in with my boyfriend’s.
Where to find art you love:
– Antique shops
– Heirlooms
– Your own photos, even an “okay” iPhone photo that you LOVE could look great with a B&W filter. Highly recommend Framebridge for custom framing!
– Online: Etsy, Rue La La, Gilt Groupe, Joss & Main, One Kings Lane, Minted
– Your collections, shadow boxes are a fun way to display little trinkets you’ve collected
– Instagram! I have been discovering some incredible artists who share their work on the app. You might find a friend of a friend or a local artist to support

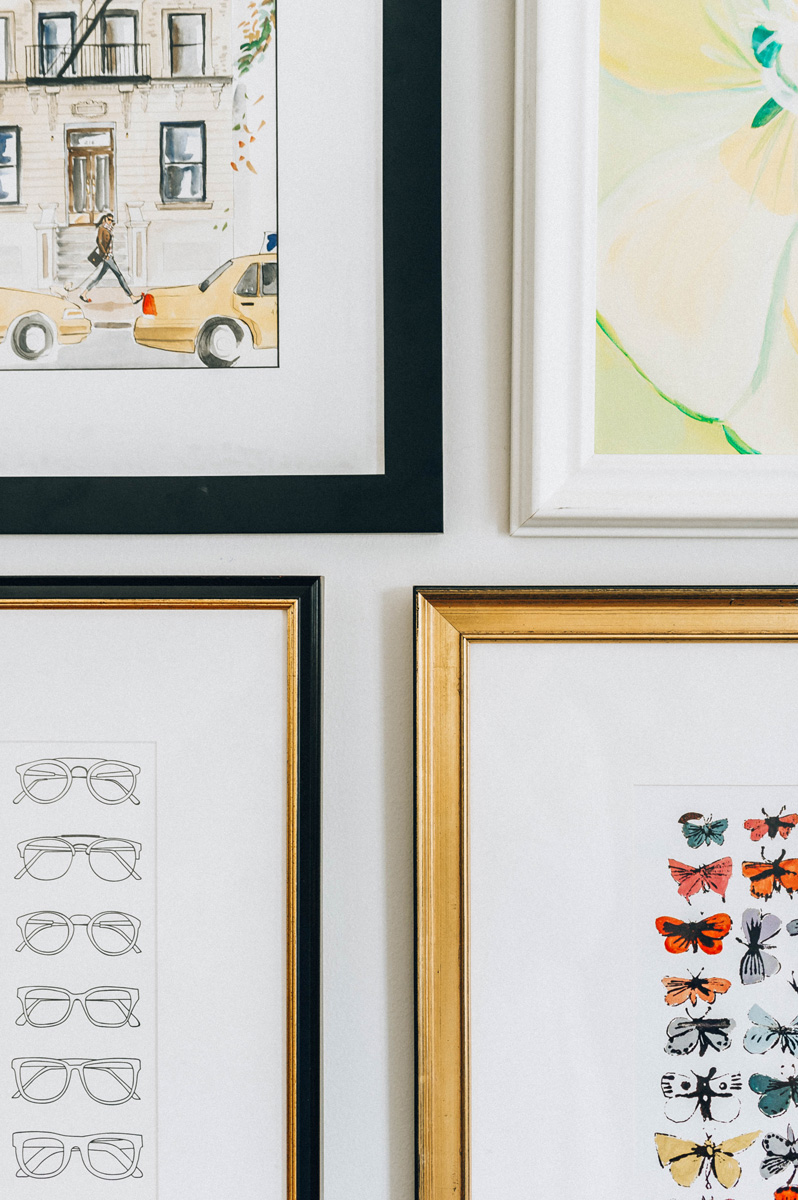
TOP ROW: Stamped Lips Print // Custom Illustration by Inslee // Painting from Middle School // Custom Monogram by Kearsley Lloyd (c/o) // Shadowbox of Pins from Henley
BOTTOM ROW: Custom Illustration from Lilly (c/o) // Framed Georgetown Cigarette Silk // Letterpress Glasses Print from Grove Street Press (c/o) // Butterfly Print // Antique Georgetown Lithograph
TWO // Map it out
There are a hundred ways you can map out where you want things to go. I’ve seen everything from marking a wall up in Photoshop to cutting out pieces of paper and hanging on the wall. The one way that I have found works the best for me is to measure the space I’m working with and mark a few “boundaries” on the floor (even just putting a few pillows down to create the outline of the workspace). From there, I start arranging and rearranging where art could go and how different pieces might work together.
For this particular wall, I had a mix of frame styles as well as a mix of colors. I wanted to make sure the sizes aligned, but also that I didn’t have all of my gold frames grouped together or all of my black and white pieces next to each other. It helps me to see the actual pieces in an actual layout and I like to be able to pick a frame up and physically move it to another spot… or swap one frame in for another. I think this speaks to my lack of vision for interior design; if I can’t see it, it’s not happening!
THREE // Scale is the MOST IMPORTANT thing
As you’re mapping out your gallery wall, be cognizant of the scale of your art. Go through Pinterest looking at different gallery walls to see how they’re formed. You’ll probably notice a pattern of big pieces mixed with smaller groups. Whenever I see a gallery wall that “doesn’t work” it’s almost always because the scale of the prints is off, either compared to each other or compared to the whole wall. It’s never that the art is too big either, it’s that the artwork looks teeny tiny on a big wall. Think big and don’t be afraid to make a statement.
I still love using smaller pieces, but I group those together so they form their own “big” space on the wall.
FOUR // Spacing is the next big thing
I touched on this in my Instagram story if you happened to catch that, but I use my yearbook Adobe InDesign skills for my gallery walls. So many other girls messaged me back about being on their yearbook staff as well. When we were doing layouts, spacing out photos by one pica ensured that the layout would work visually.
We also included an eyeline to tie together a spread. In the case of a gallery wall, there’s obviously no “fold” in the wall, but it still helps create a better visual.
The use of white space is also okay, but you shouldn’t “trap” white space. It should be around the edges of where you’re working.
What tips do you have when it comes to gallery walls?!


When you start with an empty wall for your gallery, you might be tempted to fill it up all at once, and I agree with you that it’s a lot more meaningful to give yourself time to collect pieces you love. Another temptation might be to stick to an aesthetic right away when you’re picking out your pieces, but I actually find eclectic varieties of pieces to be much more interesting; not an eclectic variety for the sake of variety, but to just allow yourself to take what you love and not worry about how it all works together yet. I also think that figuring out how to put together this variety of pieces onto the gallery wall and work cohesively would be a fun challenge, and ultimately, a lot more meaningful than composing your gallery wall of pieces that “obviously” work together, but that you might not necessarily love every individual element of. // I also love to get pieces from local markets and support local artists! -Audrey | Brunch at Audrey’s
Aww I love picture walls! And they definitely have to be created over time, picking out the pieces nice an easy.
– https://www.bloglovin.com/blogs/maja-harder-18257183
I love the look of gallery walls! I really like how you arranged yours with the different coloured frames, Carly. And thank you for your tips! 🙂
Charmaine Ng | Architecture & Lifestyle Blog
http://charmainenyw.com
I LOVE a good gallery wall! These are all great tips. I wish I had enough wall space for one in my apartment!
Kendal / Life With Kendal
These tips are super helpful. I can’t tell you how many times I’ve gone to hang up a collection of pictures and had it look wrong. Thank you! xAllie http://www.theallthatglittersblog.com
Your gallery wall looks beautiful! I love it, thanks for the tips Carly!
I hope you have a lovely Tuesday,
Michael
https://www.mileinmyglasses.com
Love that you brought the gallery wall to Hoboken!
xo Sam
http://www.thecurrentclassic.com
Thank you for sharing these tips, Carly! I am getting ready to tackle a gallery wall in our living room and I’m terrified it’ll look bad. I’ll be pinning this for reference.
I’ve been known to just throw things up on the wall, but when it comes to trickier arrangements I swear by using templates! It definitely helped when doing my stairway gallery wall. That angle really threw me! https://www.andthenwetried.com/2017/10/create-easy-stairway-gallery-wall-amazon-frames/
I love to add “antique” family photos to my gallery walls. My great grandmother and her mother had some really elegant engagement photos, and the fashions in them are amazing. People think they’re prints I purchased or from antiquing. My gallery walls are eclectic so they mix in really well, and I love having Grammys face and killer fashion sense on display.
I feel the same way sometimes when I watch Fixer upper – I honestly don’t know how they even envision a future for some of those houses… Your gallery wall looks great and I love the tips you shared!
Lauren,
http://www.atouchofsoutherngrace.com
I love gallery walls! I’ve done one for my office space and one for my boyfriend’s apartment. I like using cards for prints (like greeting cards) as they are usually 4 by 6 and can have a unique story/memory (and they’re like $1-10)!
Bianca
https://navyismyneutral-biancab.blogspot.ca/
Love that! I forgot to include cute postcards from travels
loving these tips—great advice! xo
https://www.dearserendipity.com/
As you said “I don’t have an eye for interior design” which is wrong. I can see you have done the very good job and I must say you are enthusiastic about it. keep it up.